How to Hang Wallpaper Murals
Whether you're applying a wall mural, peel & stick designs or commercial grade, each type has its own unique installation process. Select your wallpaper type below to get started with step-by-step instructions tailored to your project.
Choose Your Wallpaper Type
How to Hang Wallpaper Murals
The surface of the wall must be smooth, clean, dry and sound. Flaking paint and lose wallpaper should be removed, and any uneven surfaces must be filled. Give the wall a prime coating if its color is very different from the new wallpaper. Very absorbent surfaces, such as plaster walls, should be sized.
Mixing the Paste
- Use a bucket and whisk to mix with.
- Sprinkle content of package into 4 liters of cold water, mixing briskly for 30 seconds.
- After approximately 3 minutes stir again.
- After 15 minutes give it a good final stir and it is ready to use.
- Unused adhesive can be stored for about 14 days.
Adhesive
Always use an adhesive especially recommended for non-woven wallpaper.
Need the perfect paste for non-woven wallpaper? You can order it directly from us.
Recommended Tools
- Rollers and tray
- Bucket
- Paintbrush (For the areas that the roller misses, e.g. along the ceiling and skirting boards)
- Spirit level or plumb line (To make sure the wallpaper is straight)
- Steel ruler (To make a straight, clean cut along the top and bottom)
- Wallpaper sponge (Soft cloth or sponge, preferably a cellulose sponge)
- Pencil
- Craft knife
- Wallpapering tool or brush
Looking for the right tools for the job? Our wallpaper tool kit has everything you need.
Step by Step Guide
Follow along with the video or scroll down to our illustrated instructions to learn how to install our wall murals. This guide is for how to hang custom-sized wall murals. If you’re looking for how to hang wallpaper rolls, please check the how to hang wallpaper guide instead.
Step 1
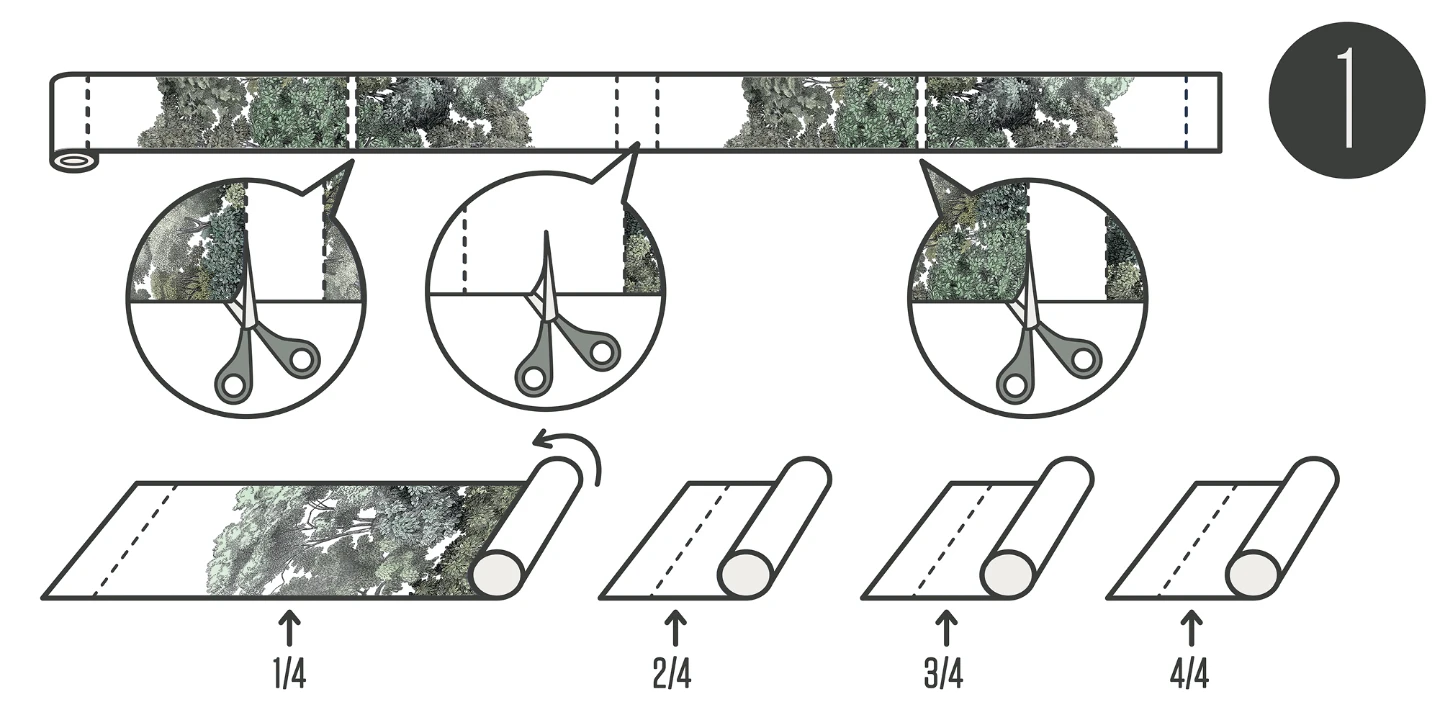
Make sure you have all the lengths and that none of them are defective or damaged. Start by dividing the lengths as indicated by the cutting symbols. Lay the lengths, with the label facing upwards, in numerical order starting with length number 1.
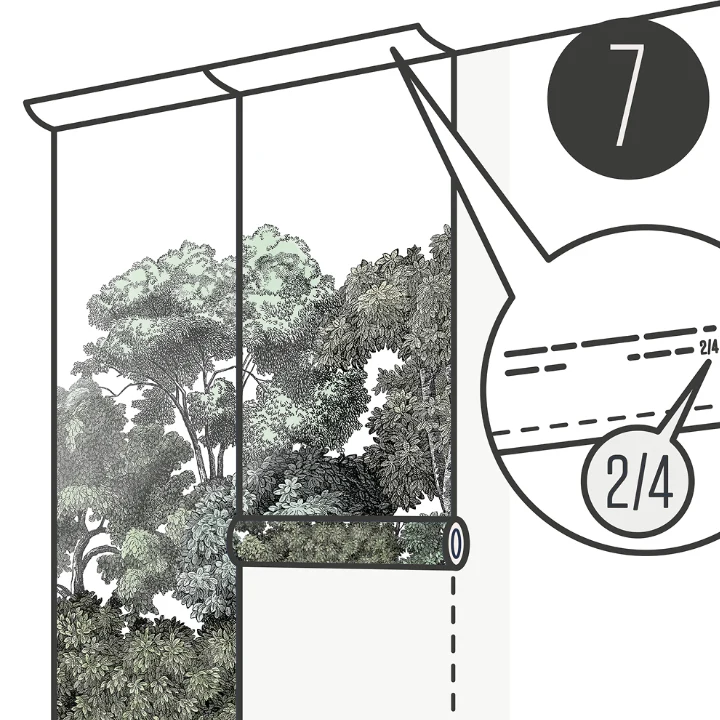
Step 2-4
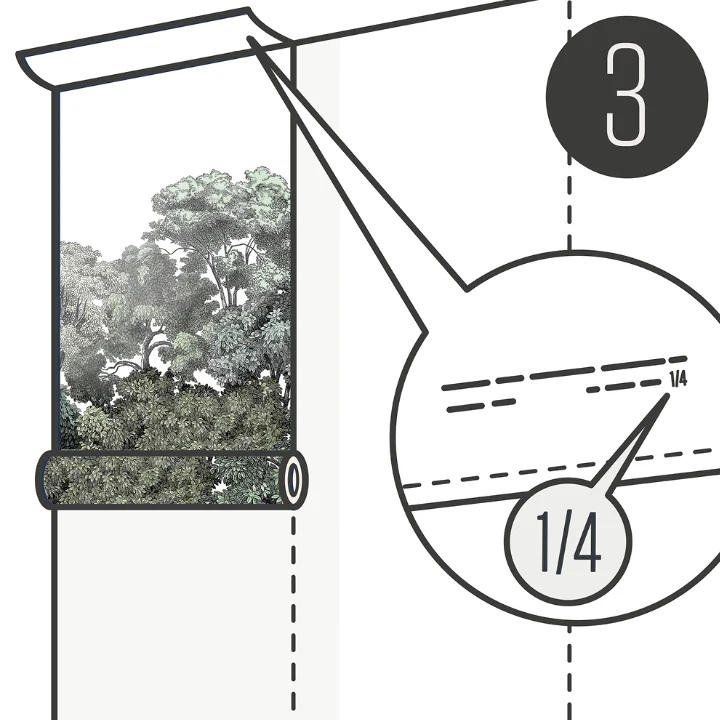
Our wall murals are always hung from the left to the right, start with the left corner of your wall. The lengths are numbered in hanging order from left to right. The lengths should be hung edge to edge without any overlapping. It is essential that the first length is vertically straight. (Tip: Make a pencil mark one wallpaper width from the left near the ceiling. Hold a plumb line on the mark and draw a vertical line down the wall. Then line up your first length of wallpaper with the pencil line.)
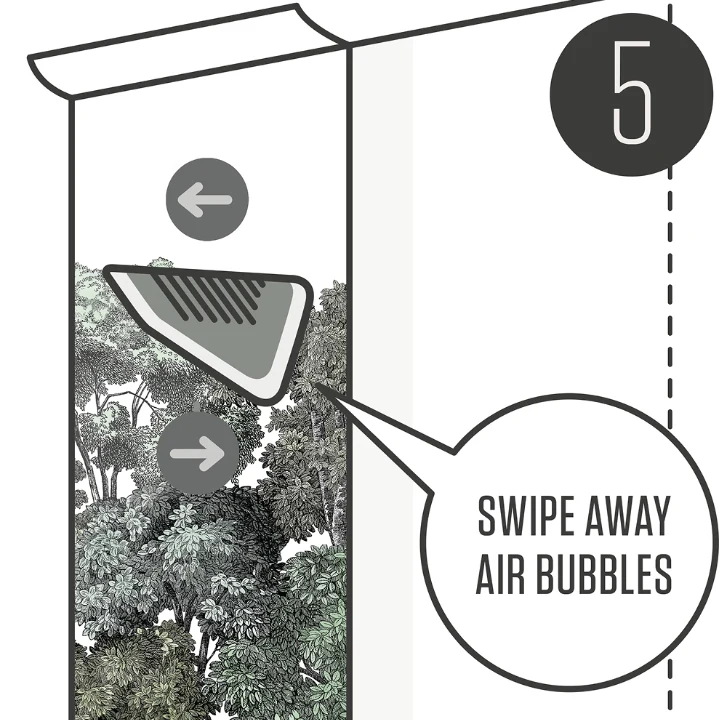
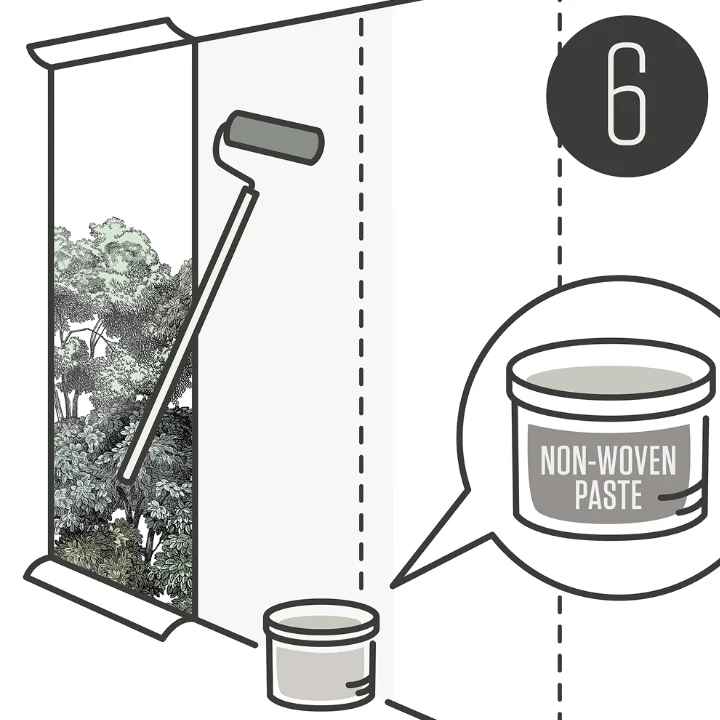
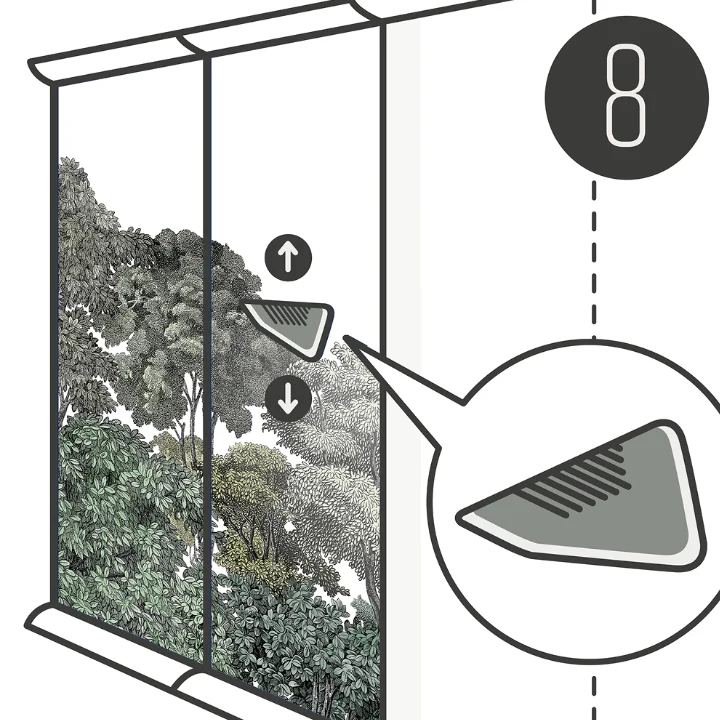
Step 5-7
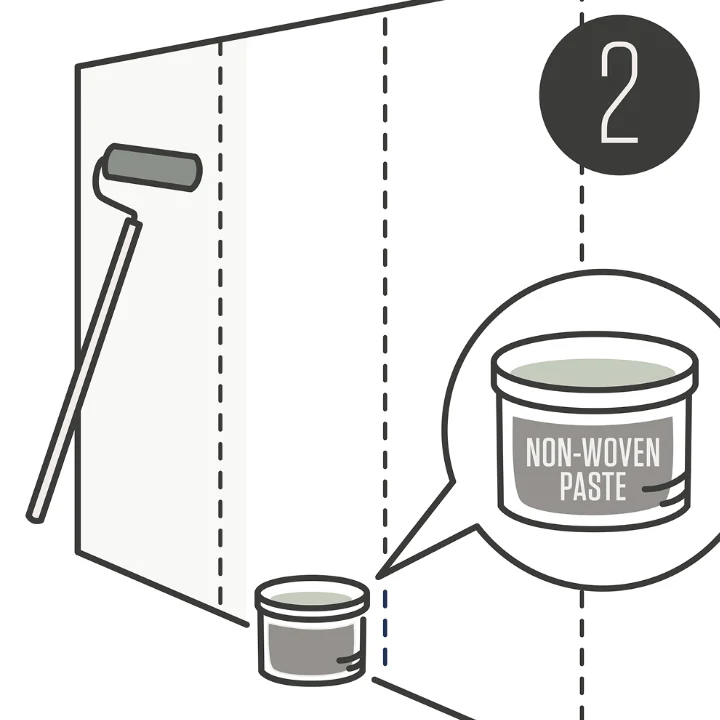
Roll the paste straight onto the wall. Be sure to evenly cover the entire surface. If you miss a spot, this will cause the wall mural to bubble. Paste an area the width of one and a half lengths at a time. Gently and evenly press the lengths together to ensure there are no visible seams. Make sure the wall has been pasted where the lengths meet so that the edges are not visible.
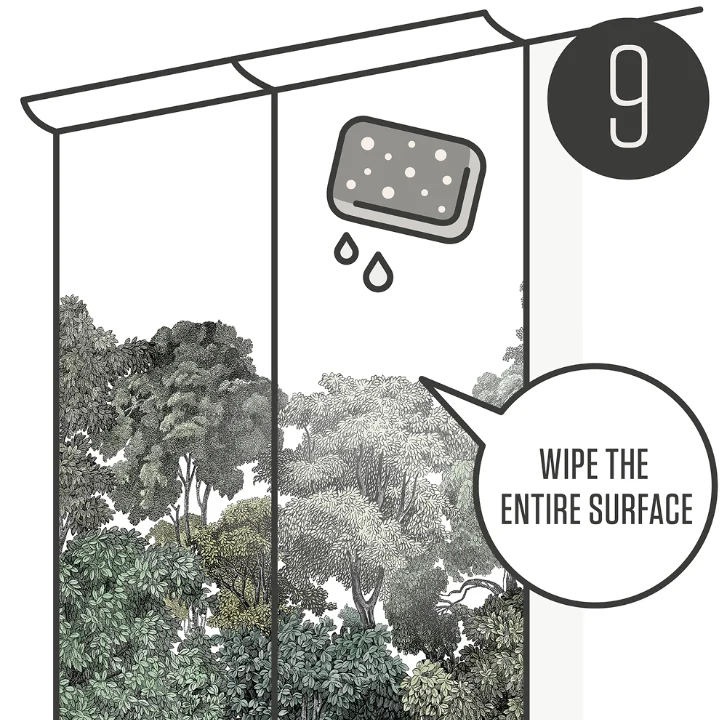
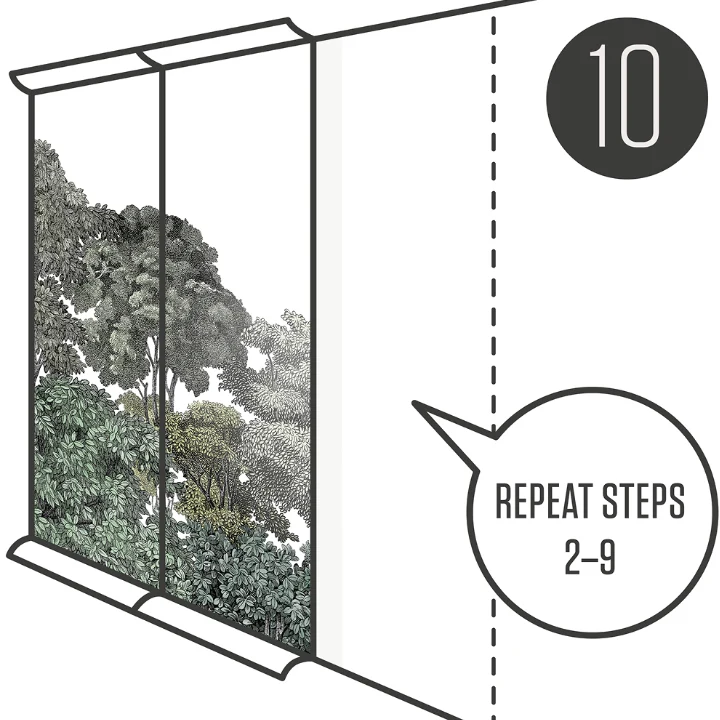
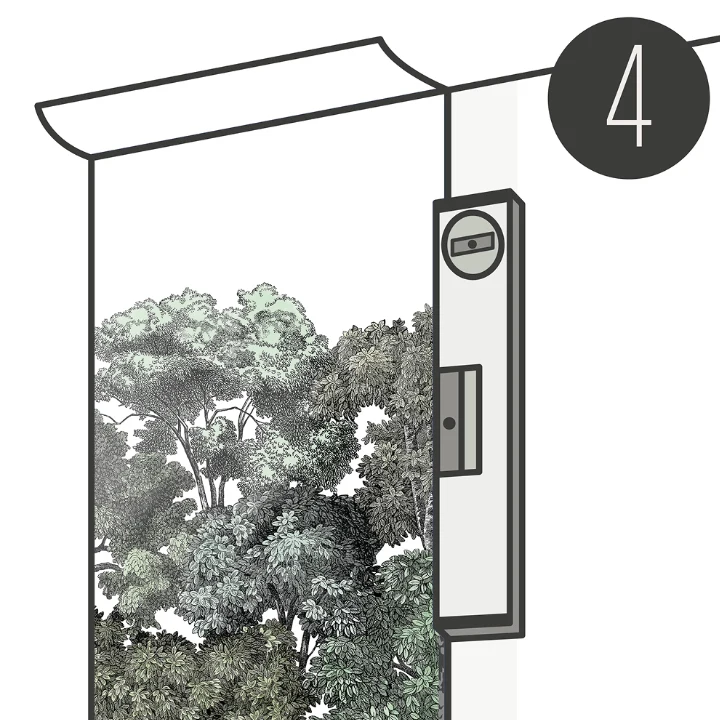
Step 8-10
Try not to get paste on the front of the wall mural. Any excess paste should be removed immediately using a wet wallpaper sponge. Smooth each length with a clean wallpapering tool or wallpaper brush. Work from the ceiling to the floor and from the middle out to the edges.

Done!
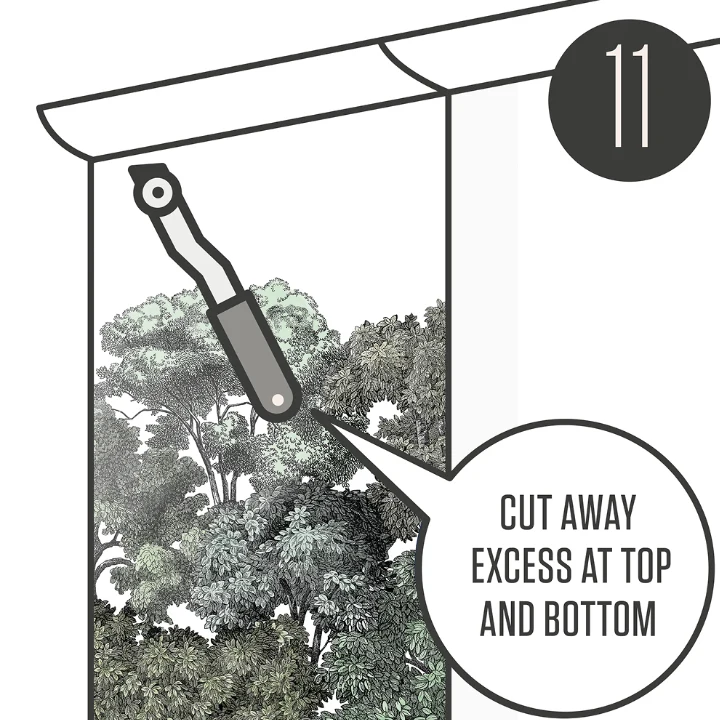
Once all the wallpaper has been hung, cut off any excess along the ceiling and floor. Always use a sharp blade to avoid tearing the paper. Keep the room ventilated and at normal room temperature for 24 hours to allow the paste to dry.
Peel & Stick Wallpaper
Peel & Stick is our self-adhesive wallpaper with the same premium look and touch as our regular non-woven wallpaper. No previous wallpapering experience is required, allowing you to transform your room in a heartbeat!
Choose which wallpaper type you prefer when inputting your wall-size.
Technical Peel & Stick Sample
When ordering samples, you have the option to include a technical Peel & Stick Sample. This can be added either during checkout or on the technical Peel & Stick Sample product page.
This sample is specifically designed to let you test the material's compatibility with your surface and ensure it meets your project needs.
Please note that it is a wallpaper type sample only and does not serve as a preview for patterns or colors.
Easy to Install and Remove
Peel & Stick is easy to install and remove and allows you to transform a room quickly. This wallpaper type is your best buddy when you want to change wallpaper more often, e.g., in children's rooms or for events.

Tools
Peel & Stick is self-adhesive and peels and sticks to the wall without applying any paste. We always include a felt scraper that you should use for the best possible result.
-Ruler
-Cloth
-Spirit Level or Plumb Line
-Pencil
-Craft Knife
-Scissors

Prep your wall
Use a damp cloth or sponge to clean the surface with warm water and mild soap. Allow the walls to dry for a minimum of 24 hours.
Meanwhile, take a final look to see if the walls are smooth. Orange peel, knockdown, or a rough wall will make it harder for the Peel & Stick wallpaper to adhere to the wall. If the surface isn't smooth, we recommend using conventional non-woven wallpaper with paste. Scroll down below to see the various types of walls.
If your walls are freshly painted, you should give the walls 4-6 weeks to cure fully. Make sure the color is uniform and doesn't differ significantly from your chosen wallpaper.

Divide the lengths
Start by dividing the lengths as indicated by the cutting symbols. Lay the lengths with the label facing upwards in numerical order, starting with length number one. Let the lengths lay flat for at least 24 hrs to climatize in the same room as intended for installation. Ensure you have all the lengths and none are defective or damaged.

Apply Peel & Stick to the wall
The lengths are numbered in hanging order from left to right. The lengths should be hung edge to edge without any overlapping. The first length must be vertically straight.
Pro tip! Make a light pencil mark one wallpaper width from the left near the ceiling. Hold a plumb line on the mark and draw a faint vertical line down the wall. Line up your first length of wallpaper with the pencil line.
Hang the second length. Gently and evenly press the lengths together to ensure no visible seams. Smooth each length with the included felt scraper. Work from the ceiling to the floor and from the middle to the edges.

Cut off excess
Once all the wallpaper has been hung, cut off any excess along the ceiling and floor. Always use a sharp blade to avoid tearing the paper.

Use the felt scraper
Finally when you have your panel(s) on your wall, use the felt scraper with a fair amount of pressure and smooth out all possible air between the panel and your wall. This is an important step in order to make the wallpaper fully stick to your wall.

Done!
This is how refine your wall in a heartbeat!
Peel & Stick is recommended for
Peel & Stick is recommended for smaller areas, such as a feature wall. It is usually easier to use regular non-woven wallpaper if you want to wallpaper a large room or several walls.
Peel & Stick is not suitable in rooms with significant temperature changes and varying humidity, such as bathrooms. Using Peel & Stick wallpaper in the ceiling is not recommended.
The wall or surface needs to be smooth and even. Orange peel, knockdown, or a rough wall will make it harder for the Peel & Stick wallpaper to adhere to the wall.
Wall Type
Smooth Surface
Peel & Stick Wallpaper is a match made in heaven for this wall type.
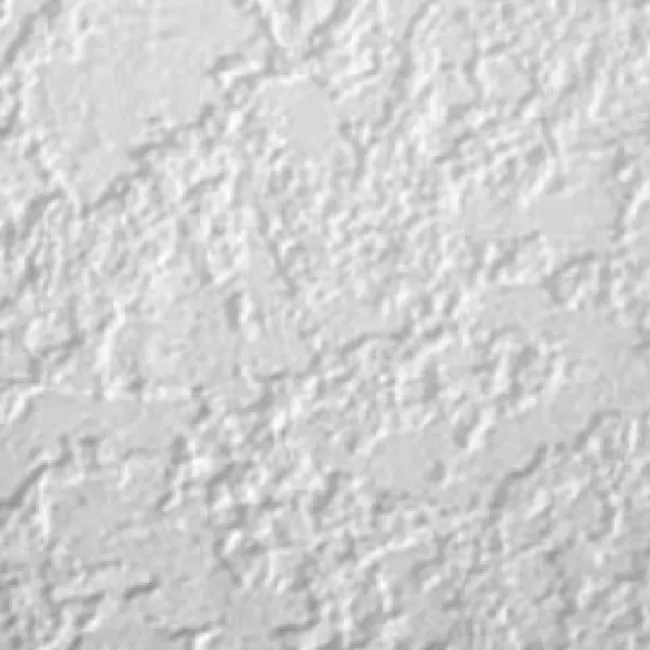
Wall Type
Structured Surface
This wall type makes it a bit more difficult for Peel & Stick wallpaper to adhere to the wall and therefore is not recommended for Peel & Stick.
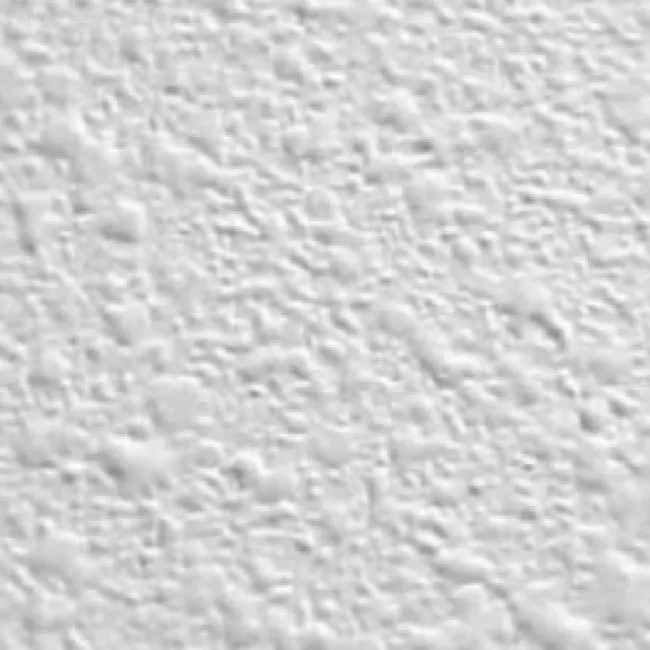
Wall Type
Rough Textured Surface
This wall type makes it difficult for Peel & Stick wallpaper to adhere to the wall and therefore is not recommended for Peel & Stick
Ready to make your space vibrant?
Wallpapering the ceiling might sound hard — but guess what? With some preparations and will, your ceiling is about to go from forgettable to striking.
How to Wallpaper a Ceiling
How to succeed
Work in sections: One step at a time. Unfold just enough wallpaper to handle smoothly. No rush.
Take your time: Breathe. Smooth. Align. Repeat. It's not a race—it's a transformation.
Bring a buddy: Gravity is real. A second pair of hands = twice the power.
What you will need
Non-woven Adhesive
Bucket
Pasting brush or roller
Damp microfiber cloth
Straight edge
Scissors
Sharp knife (Stanley or craft)
Tape measure
Pencil
Spirit or laser level
Wallpapering tool
Stepladder (because ceilings)
Prep your ceiling
Start with a smooth, clean, completely dry ceiling.
No dust, no grease, no nonsense. Fill holes, sand bumps, and if needed—repaint in a color close to your wallpaper’s base.
Pro tip: If your walls are freshly painted. Let paint dry and fully cure before you dive in.
⚡ Turn off the electricity and clear anything that’s in the way. Safety = stylish.
Plan your layout
Pick your starting point and direction.
Measure your wallpaper and snap a straight line across the ceiling with your laser level.
Pro tip: That first panel needs to be perfectly straight. It’s the rebel leader for all the rest.
Paste the ceiling
Grab your gear and go!
Roll that paste directly onto the ceiling (our wallpapers are non-woven so ).
Brush the edges, roll the rest, and don’t sweat a little mess—wipe off extra paste with a damp cloth.
Paste about 1.5 panel widths at a time for best flow.
First Panel
Pull the panel up to the ceiling and line it up with your guide.
Smooth it out using your wallpaper tool—from the center out. No need to tiptoe—the wallpaper can take it 💪
Trim the edges neatly with a sharp knife.
Keep Going, Keep Glowing
Match the pattern and repeat, panel by panel.
Wipe off any excess adhesive as you go.
Soon, you'll have a ceiling so good, people will look up just to admire it 😍
Around a Ceiling Light?
Roll on paste around the light fixture and cut a small hole or “X” in the wallpaper so the fixture can slide through.
Press the wallpaper into place and trim the edges with a sharp knife for that clean, pro look.
Add a little extra paste around the edges and wipe off any mess.
That’s it, You did it!
From blank to majestic and vibrant — your ceiling is now nothing like a cliché.
📸 Don’t forget to snap a pic and tag us. We live for a good refined ceiling. #bienfaitparis